HTTP Client
The HTTP Client in DevKnife provides a complete solution for testing REST APIs and HTTP endpoints directly from your Mac. Write requests in a simple text format, execute them with a click or keyboard shortcut, and instantly see detailed responses. Everything works offline with no data ever leaving your computer.
Key Features
Section titled “Key Features”- Multiple HTTP methods – GET, POST, PUT, DELETE, PATCH, HEAD, OPTIONS, and more
- Variables and environments – define reusable variables and load them from .env files
- Named requests – reference previous responses in new requests
- Response caching – automatically cache responses from named requests
- File operations – save and open .http request collections
- Keyboard shortcuts – execute requests with Cmd+Enter
- Layout switching – toggle between side-by-side and stacked views
- Syntax highlighting – color-coded requests for better readability
Getting Started
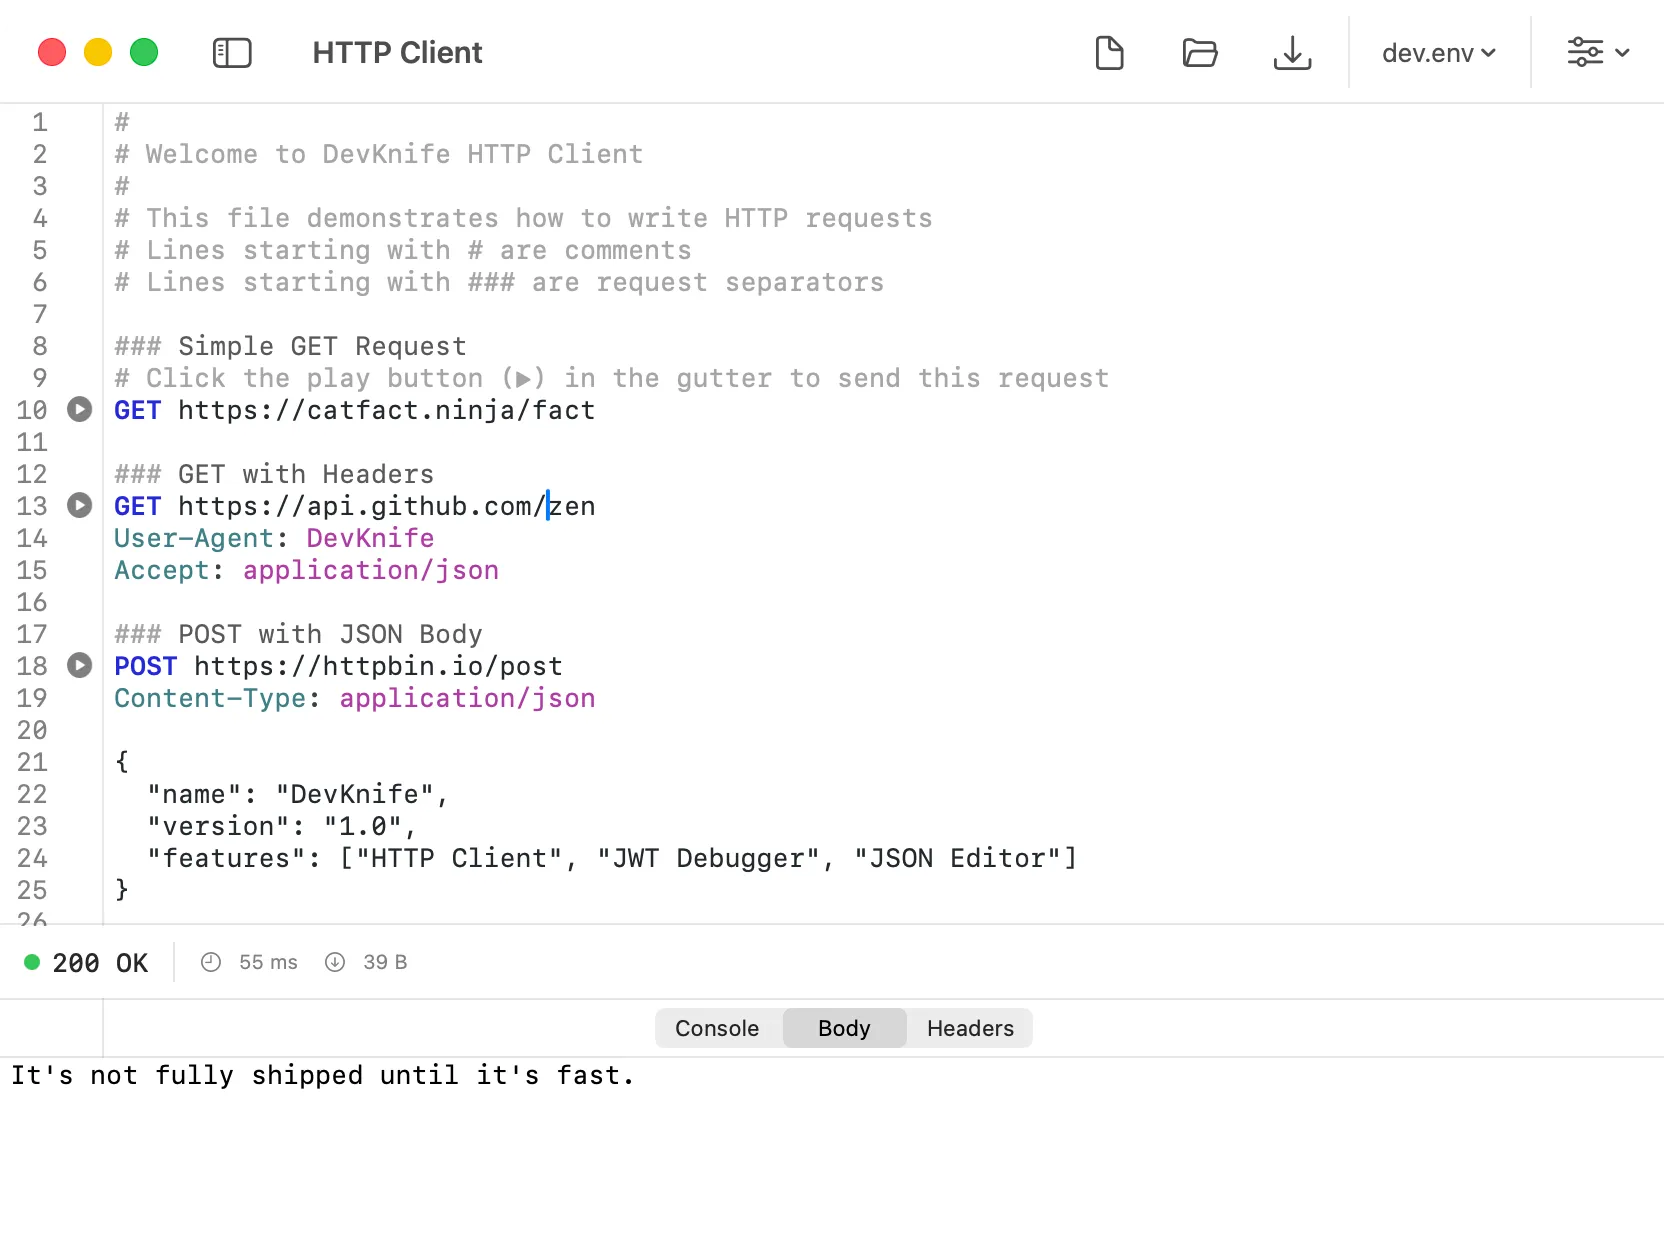
Section titled “Getting Started”When you first open the HTTP Client, a demo file loads automatically with examples showing how to write requests. The format is simple and intuitive:
### Simple GET RequestGET https://api.example.com/users
### POST with Headers and BodyPOST https://api.example.com/usersContent-Type: application/jsonAuthorization: Bearer token123
{ "name": "John Doe",}Each request starts with an HTTP method and URL, followed by optional headers and a request body. Requests are separated by ### comment lines.
Executing Requests
Section titled “Executing Requests”There are multiple ways to execute a request:
- Click the play button in the gutter next to any HTTP method
- Press Cmd+Enter when your cursor is anywhere within a request block
- The play button changes to a stop button while a request is running, allowing you to cancel it
Variables
Section titled “Variables”Variables make your requests reusable and maintainable. Define them at the top of your file:
@baseUrl = https://api.example.com@token = your-api-token-here
GET {{baseUrl}}/usersAuthorization: Bearer {{token}}
Use @variableName = value to define a variable, and {{variableName}} to reference it anywhere in your requests.
Environment Files
Section titled “Environment Files”Load variables from .env files to manage different environments (development, staging, production):
- Click the environment dropdown in the toolbar
- Select “Select Environment…”
- Choose your .env file
The environment file format is standard:
API_URL=https://api.staging.example.comAPI_TOKEN=staging-token-123Reference these in your requests as {{API_URL}} and {{API_TOKEN}}.
Named Requests
Section titled “Named Requests”Give requests names to reference their responses later:
# @name getUserGET https://api.example.com/users/1
### Use the response from the previous requestPOST https://api.example.com/postsContent-Type: application/json
{  "userId": "{{getUser.response.body.id}}",  "title": "New Post"}
The # @name comment assigns a name to a request. Later requests can access the response using {{requestName.response.body.fieldName}} syntax.
Request Format
Section titled “Request Format”A complete request includes:
-
Method and URL (required)
POST https://api.example.com/endpoint -
Headers (optional, one per line)
Content-Type: application/jsonAuthorization: Bearer token -
Body (optional, after a blank line)
{"key": "value"}
Response Panel
Section titled “Response Panel”The response panel shows:
- Status code and message – e.g., “200 OK”
- Response time – how long the request took
- Response size – total bytes received
- Headers – all response headers
- Cookies – parsed Set-Cookie headers
- Body – formatted response body with syntax highlighting
File Operations
Section titled “File Operations”Save and organize your request collections:
- New (Cmd+N) – start a fresh request file
- Open (Cmd+O) – open an existing .http file
- Save (Cmd+S) – save changes to the current file
- Save As – save to a new location
The current file name appears in the title bar with a dot (•) indicator for unsaved changes.
Layout Options
Section titled “Layout Options”Switch between viewing modes using the options menu (gear icon):
- Side-by-Side – request editor and response panel next to each other
- Stacked – request editor above response panel
Your preference is saved and restored when you reopen the app.
Supported HTTP Methods
Section titled “Supported HTTP Methods”All standard HTTP methods are supported:
- GET
- POST
- PUT
- DELETE
- PATCH
- HEAD
- OPTIONS
- CONNECT
- TRACE
Syntax Highlighting
Section titled “Syntax Highlighting”The editor provides syntax highlighting for:
- HTTP methods – bold and colored
- Comments – lines starting with #
- Separators – ### dividers between requests
- Variable declarations – @variableName = value
- Variable references – {{variableName}} in URLs, headers, and bodies
- Headers – name:value pairs
- Request names – # @name declarations
Privacy
Section titled “Privacy”The HTTP Client runs entirely on your Mac. No requests are routed through external servers, and no data is collected or transmitted to third parties. Your API keys, tokens, and sensitive data remain completely private.
- Use the demo file as a starting point – it includes examples of all major features
- Save commonly used requests in .http files for quick access
- Organize requests with
###separators and descriptive comments - Name your requests when you need to chain multiple API calls
- Use environment files to switch between development and production endpoints
- Press Cmd+Enter from anywhere in a request to execute it quickly