 Simon
Simon
·
Dev Log DevKnife Update 1.17.0
DevKnife 1.17.0 adds a new DNS Inspector, favorite tools, WHOIS interface improvements, and a direct link to the DevKnife community.
Read MoreAn SSL certificate helps your Mac confirm that it is connecting to the right website or server. It provides public-key information used to authenticate an encrypted connection.
Although these certificates are now used with TLS, most people still call them SSL certificates. When a certificate expires, uses the wrong hostname, or cannot be trusted, browsers and apps may refuse to connect.
Checking a certificate can help you find:
There are several ways to check an SSL certificate on macOS. You can use an online checker, run a command in Terminal, or inspect it with a local Mac app. This guide covers all three options.
Online certificate checkers are convenient when you want to inspect a public website. Enter a hostname, wait for the service to connect, and it will usually show the certificate issuer, expiration date, supported hostnames, and chain.
Some services also test the server’s TLS configuration and report weak protocols or other security problems. This is useful when you need a broader public-server test rather than a quick look at one certificate.
There are a few limitations. The service performs the check from its own server, not from your Mac. It may not be able to reach a development server, a private network address, or another host that is only available from your network. You also have to share the hostname you are checking with the service.
Online tools are a good choice for public websites, but they are less useful for private hosts and local certificate files.
If you are comfortable with command-line tools, OpenSSL can connect to a server and print its certificate details.
For example, this command checks the certificate presented by example.com on the standard HTTPS port:
openssl s_client -connect example.com:443 -servername example.com </dev/null 2>/dev/null \ | openssl x509 -noout -subject -issuer -dates -fingerprint -sha256Replace example.com with the hostname you want to inspect. The -servername option sends the hostname during the TLS connection, which is important when several websites share the same server.
To view all available details, use -text instead:
openssl s_client -connect example.com:443 -servername example.com </dev/null 2>/dev/null \ | openssl x509 -noout -textYou can also inspect a local PEM certificate:
openssl x509 -in certificate.pem -noout -textThese commands are flexible and easy to include in scripts. The downside is that the full output is long and can be difficult to scan if you only want to know whether the certificate is trusted, which domains it covers, or how many days remain before it expires.
DevKnife includes a native Certificate Inspector that checks remote servers and local certificate files in a visual interface.
For a remote server:
443.DevKnife opens a TLS connection to the server, retrieves the available certificate chain, and evaluates it using the trust settings on your Mac. It also checks whether the certificate matches the hostname you entered.
The connection stops after the TLS certificate exchange. DevKnife does not send an HTTP request to the server, and it does not send the certificate to another analysis service.
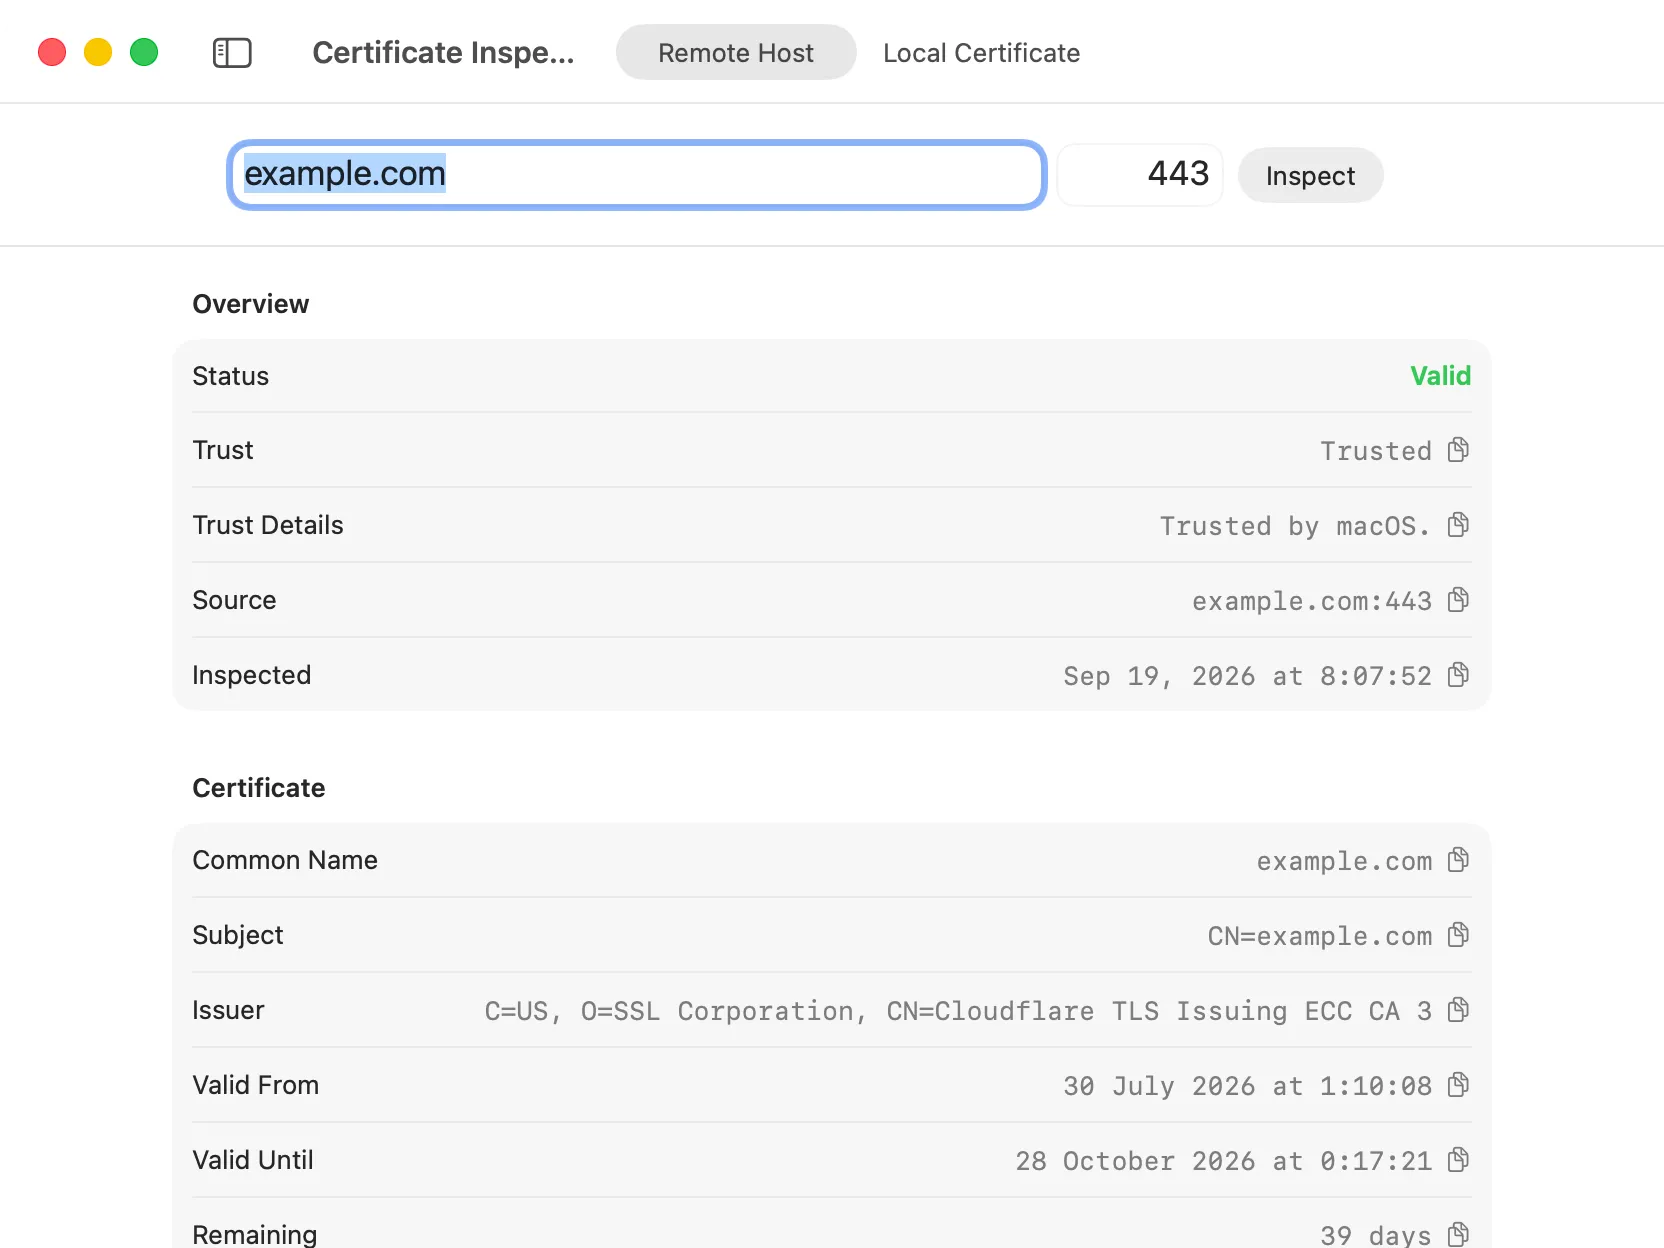
DevKnife showing the trust and validity details for example.com’s TLS certificate.
The result shows the certificate’s status and trust information, followed by details such as:
DevKnife marks certificates that are expired, not valid yet, not trusted, or due to expire within 30 days. Each value can be copied directly from the result.
Certificate Inspector can also open a certificate stored on your Mac:
PEM files can contain several certificates. If the file includes a chain, DevKnife displays each certificate in the order it appears.
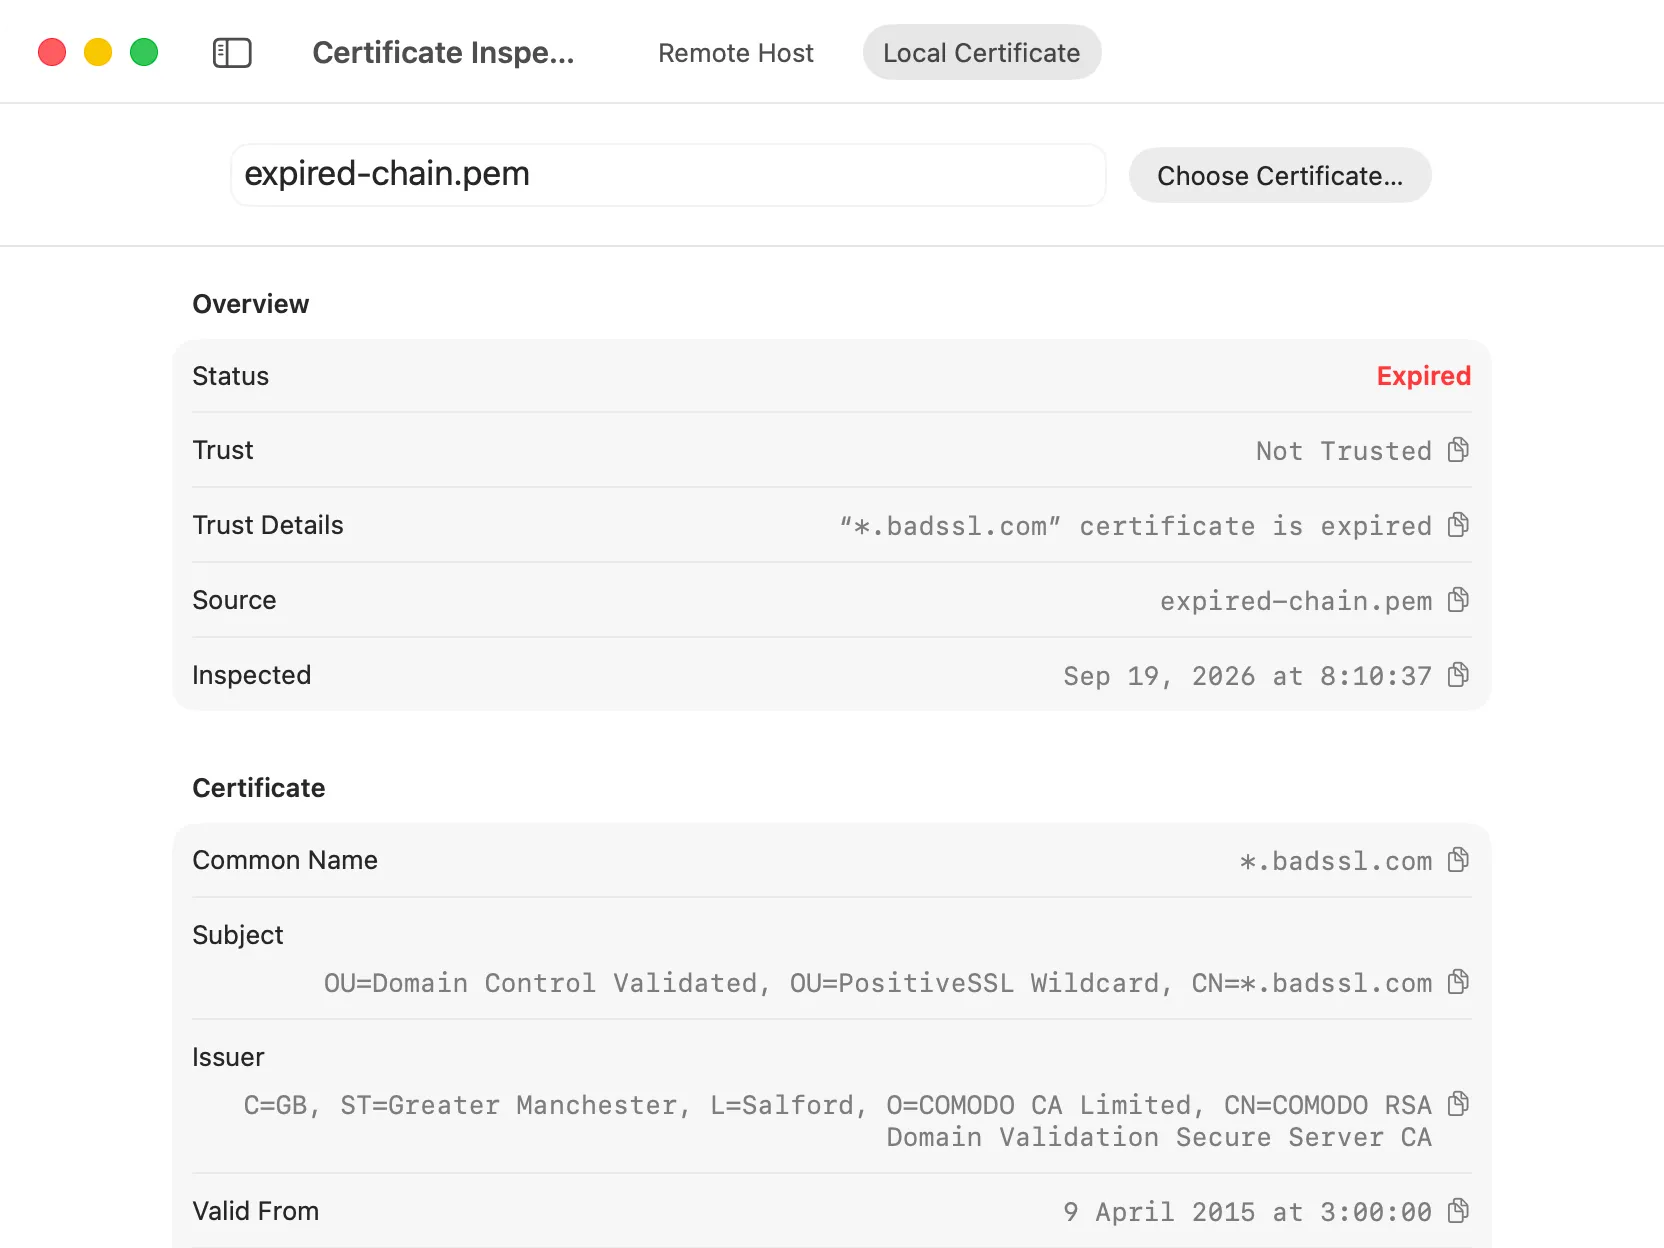
DevKnife identifies an expired certificate in the expired-chain.pem file.
Local files are inspected entirely on your Mac. DevKnife checks their dates and evaluates whether macOS trusts the supplied certificate or chain. Because no hostname is provided in this mode, it cannot check whether the certificate belongs to a particular website.
Read more about Certificate Inspector in the DevKnife documentation.
Use an online checker when you want a quick public report for a website. Use OpenSSL when you are already working in Terminal, need raw certificate output, or want to include the check in a script.
Use DevKnife when you want a readable result from your own Mac, need to inspect a private host or custom port, or have a local certificate file that you do not want to upload anywhere.
You do not need to understand every certificate field to check the important details. In most cases, you only need to confirm that the hostname is correct, the certificate is trusted, and the expiration date is still safely in the future.
Online tools and Terminal commands both work well in the right situation. For a simple visual check, DevKnife’s Certificate Inspector brings remote hosts, local files, macOS trust evaluation, and certificate-chain details together in one native app.
DevKnife 1.17.0 adds a new DNS Inspector, favorite tools, WHOIS interface improvements, and a direct link to the DevKnife community.
Read More
Fast, private, and built for macOS.